Boats

BURST GUARD™ Guarantee -100˚F

Keep your boat afloat with WINTERPROOF™ Marine Water System Antifreeze solution, specially formulated for boats.

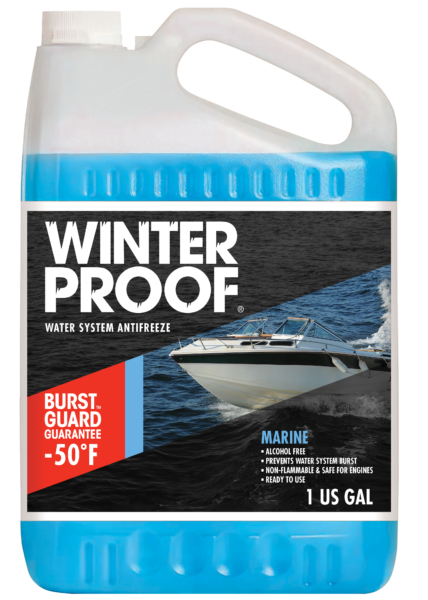
It’s smooth sailing with WINTERPROOF™ Marine Water System Antifreeze – now formulated specifically for boats. Keep your waterlines and heaters protected through harsh winters, and ready for the open water ahead.

Trust WINTERPROOF™

  1. Complete water system protection.
  2. Alcohol free, non-flammable formula.
  3. Prevention of burst waterlines.
  4. Safe for engines.
  5. Safe for use on plastic and metal pipes.
  6. Inhibits rust & corrosion in metal pipes.
  7. Keeps waterlines, pipes, and seals lubricated.
  8. Specialized, ready to use formula.

How to Winterize Your Boat

Keep your boat safe through the winter and ready to set sail in the spring with WINTERPROOF™ Marine Water System Antifreeze. Our BURST GUARD™ Guarantee -100˚F and following these steps will help you avoid complications and costly repairs:

1 Clean your boat.

This is a great time to clean your boat and ensure that all of the dirt, fouling, and other grunge off. It’ll be easier to clean it off now, rather than in the spring after it’s had months to sit and solidify on your boat. Our advice? Work your way inside out. Start with the cabin, saloon, etc. and move to the deck, and finally to the hull.

You can also clean and protect any exposed teak and give the topsides and exposed fibreglass a wax to ensure it’s protected over the winter and ready for the open water in the spring!

2 Drain and refresh the oil and oil filter.

First, you’ll want to drain the crankcase oil to remove any contaminants that can corrode and damage the engine parts during storage. Before beginning, attach a set of flushing muffs to a garden hose and position them on both sides of the water intake for your motor. Turn on the water source, start your motor and allow it to run for 5-10 minutes to allow the oil to warm up. Next, turn off the motor and remove the flushing muffs.

Follow the manufacturer’s instructions on how to properly drain the oil and change your oil filter. Once the oil has been drained, remove and change your oil filter and fill the crankcase with new oil.

3 Refresh the lower unit gear oil.

Ensure you know the viscosity and quantity of gear oil that your outbound motor requires. If you don’t know check your owner’s manual.

Place a catch pan under the gear box to capture any oil that drips. Remove the bottom plug, being careful not to remove the gasket along with the plug. Once you see little bit of gear oil drip out, remove the top vent plug. This will allow the gear oil to drain freely out of the bottom hole. In good condition, gear oil should be translucent with a green tint. If water has seeped into the gear box, the oil will have a milky appearance. If you see the latter, contact a service professional for assistance.

To eliminate as much air in the gear box as possible, pump your new gear oil in upward, from the bottom hole until it overflows slightly through the top. For smaller outboard motors, you can press the nozzle of the tube of gear oil into the bottom hole and squeeze slowly into the casing until it overflows out the top. For larger outboard motors, you can follow this same process using a gear oil pump. With either type of motor, once oil overflows through the top vent hole, replace the top plug, remove the tube or pump nozzle and quickly replace the plug.

4 Stabilize your fuel.

Add a fuel stabilizer and top up your fuel tank to avoid excess air in your tank. Because air holds moisture, when the temperature drops, the moisture will condense and will end up as water in the bottom of your fuel tank. This can fill your water separator and can cause problems when trying to start your boat in the spring. Follow the manufacturer’s instructions on the bottle of fuel stabilizer you purchase. To run the stabilized fuel through your fuel system, reattach your flushing muffs, turn on your water source, and restart the motor, allowing it to run again for 5 to 10 minutes, then shut it off.

This is also a great time to replace your fuel filter and water separator.

5 Fog the cylinders and apply your WINTERPROOF™ Marine Water System Antifreeze.

Time to winterize your block with plumbing antifreeze.

After allowing the motor to run for 5 to 10 minutes, per the previous step’s instructions, shut it off and disconnect the garden hose. Hook up the flushing muffs to a winterizing kit and fill the kit with WINTERPROOF™ Marine Water System Antifreeze.

Remove the cowling to gain access to your boat’s air intakes located at the front of the engine. Open the valve to the winterizing kit and restart your motor and allow the antifreeze solution to drain into the tank. You’ll start to see the antifreeze discharging via the water that exits the motor.

While the engine is running. spray fogging oil into the carburetor(s). You may notice lower horsepower engines stall, and higher horsepower engines will cough and sputter – this is normal. Continue running the motor while spraying a decent amount of fogging oil through the intake. Discontinue the fuel line from the engine and continue to spray fogging oil into the engine until it dies. Doing this will prevent varnish deposits from building up while inactive during the winter.

If your boat has an Electronic Fuel Ignition (EFI), you need to follow a slightly different procedure for fogging. First, ensure that you’re using a fogging solution formulated for EFI motors.

Rather than fogging the cylinders, put a small amount of stabilized gasoline in a container and mix in a fogging oil formulated for EFI motors. Run a fuel line from the container to the motor and run the motor until you see white smoke exiting the exhaust. Before the winterizing kit runs dry, turn off the motor. Do not run the motor until it dies from lack of fuel as this can damage the fuel system.

6 Don’t store on empty.

If your boat has an oil-injected two-stroke motor, fill the two-stroke oil tank to avoid water condensation build up while in storage.

Finally, squeeze some fresh grease into the pivot tube and tilt tube with a grease gun, and spray a corrosion inhibitor onto the power head and replace the cowl.

Lastly, remove your boat’s propeller and inspect it for damage. Ensure that the shaft is clean and clear of debris, lubricate it with grease, and reinstall the propeller. Store the engine in an upright position to allow any water to drain from it.

Product Specifications

Item # Unit/Case Pack UPC SCC14
35-364WPUS/13147 4 x 1 USG 056438909545 40056438909543
35-365WPUS/13148 2 x 2.5 USG 056438909552 40056438909552
35-369WPUS/13149 4 x 55 USG - -
35-369WPUS-275/13150 1 x 275 USG - -

Tips for Finding MSDS

  1. Have the item # handy before starting the MSDS search
  2. Use the link below to access our MSDS database portal
  3. Select the red SEARCH button on the left-hand side of page
  4. Type item # in the Product Code box and press search (XX-XXXX)
  5. Hover over the yellow MSDS button and select either English or French
Find MSDS